> ## Documentation Index
> Fetch the complete documentation index at: https://statsig-4b2ff144-kill-dead-node-pages.mintlify.site/llms.txt
> Use this file to discover all available pages before exploring further.
# Okta SCIM User and Project/Role Management
## Import Existing Statsig Users and Groups
Users not assigned to the integration cannot be pushed into groups.
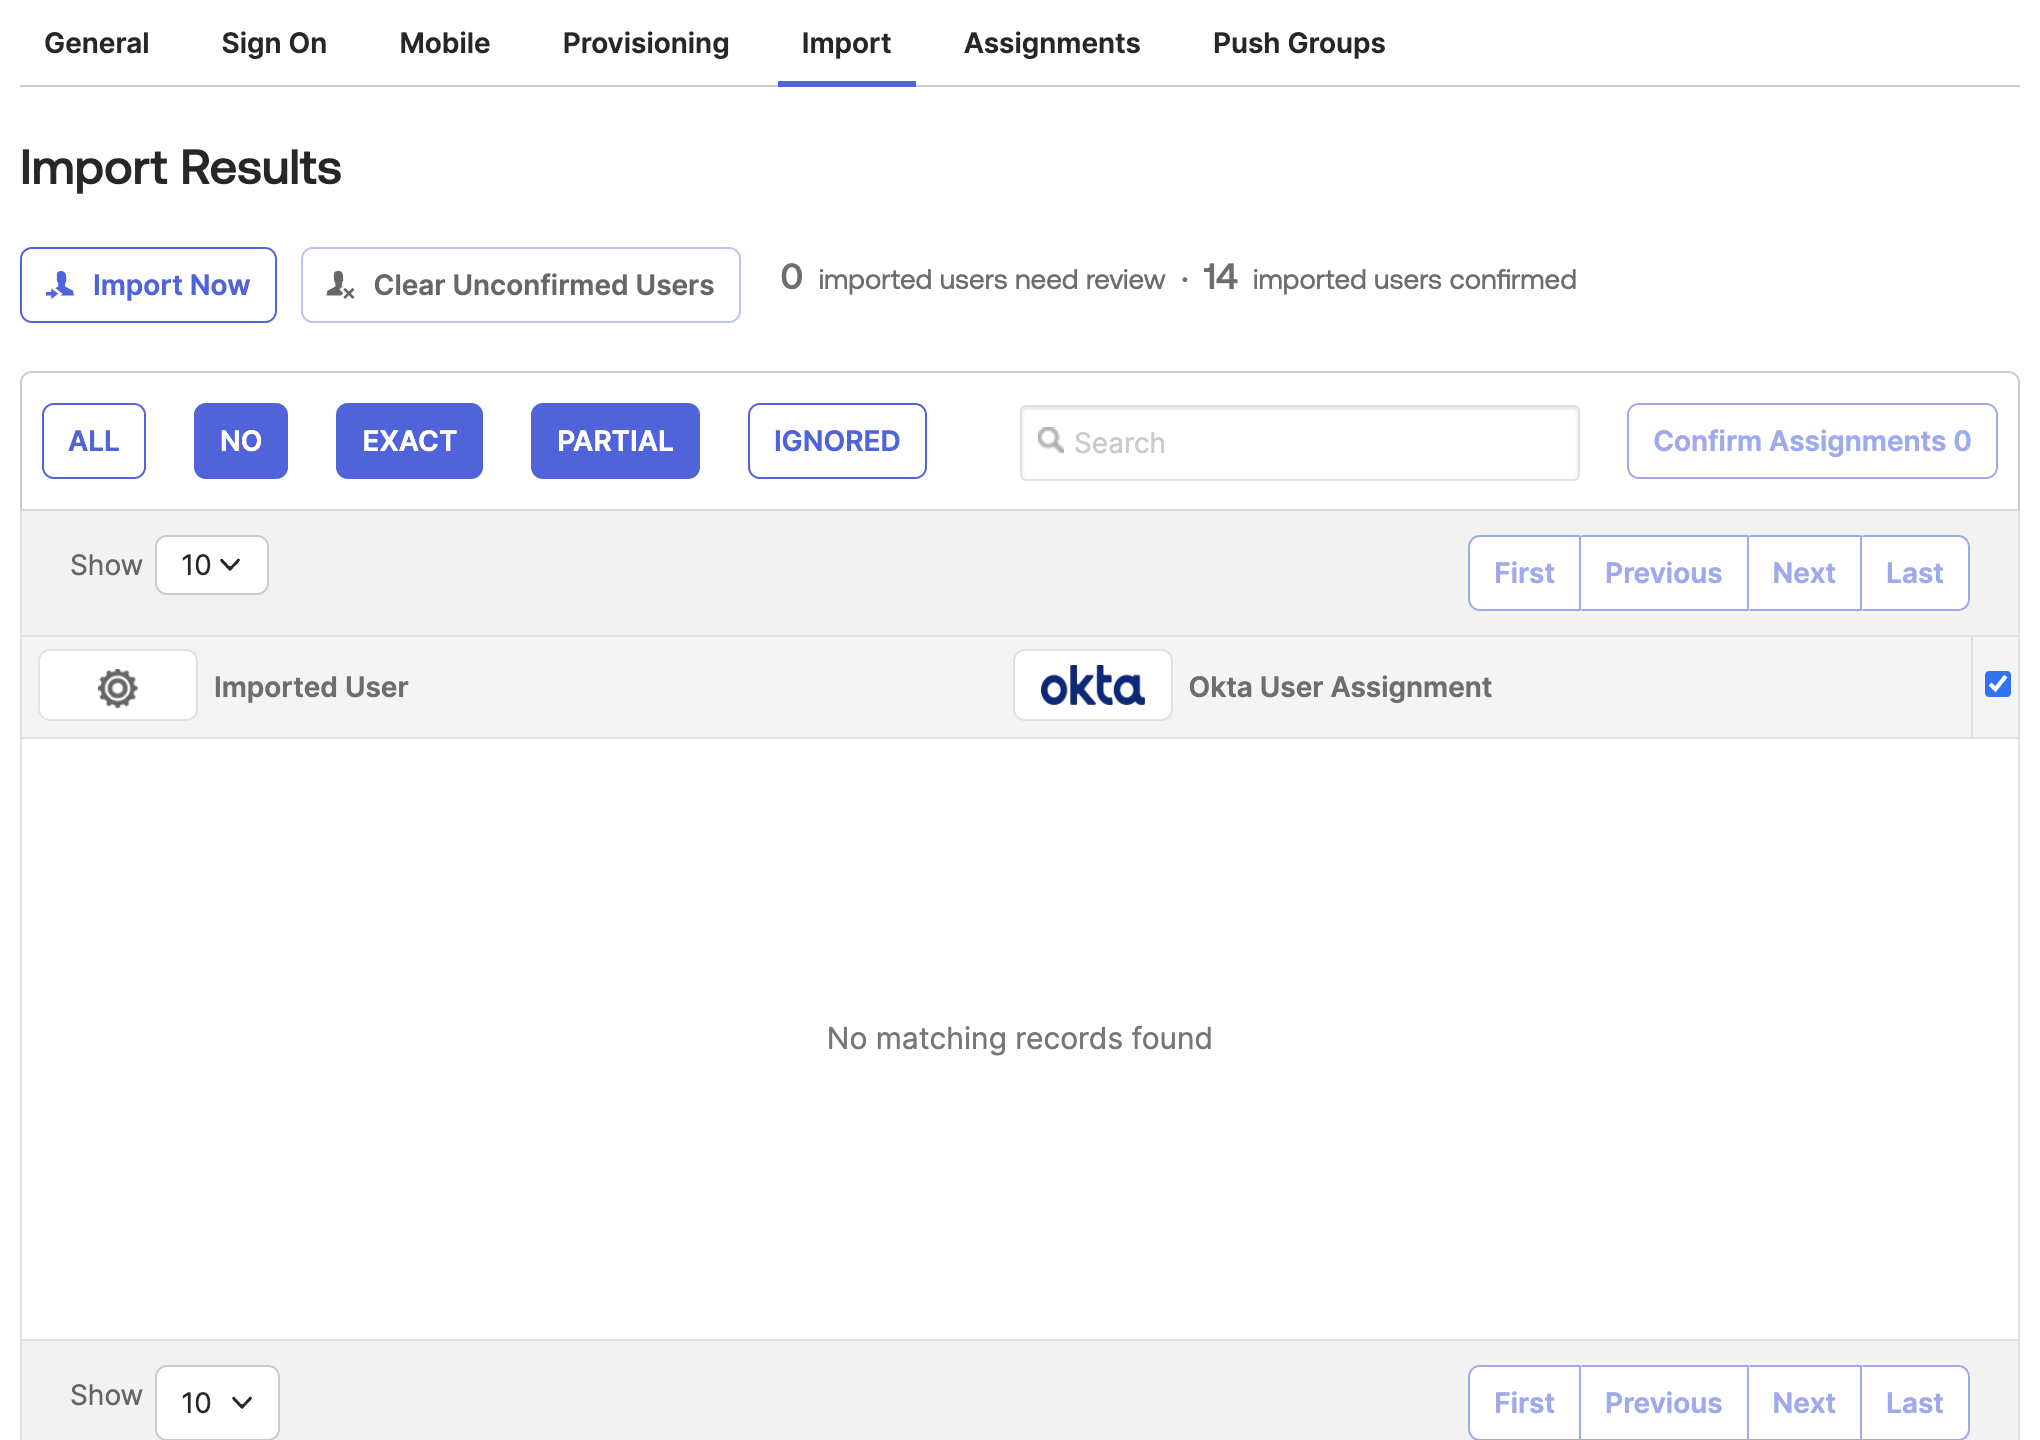
* In Okta, go to the Statsig app's "Import" tab
* Click "Import Now" to fetch existing Statsig users and groups
* Process the imported users as needed
 ## Manage User Assignments
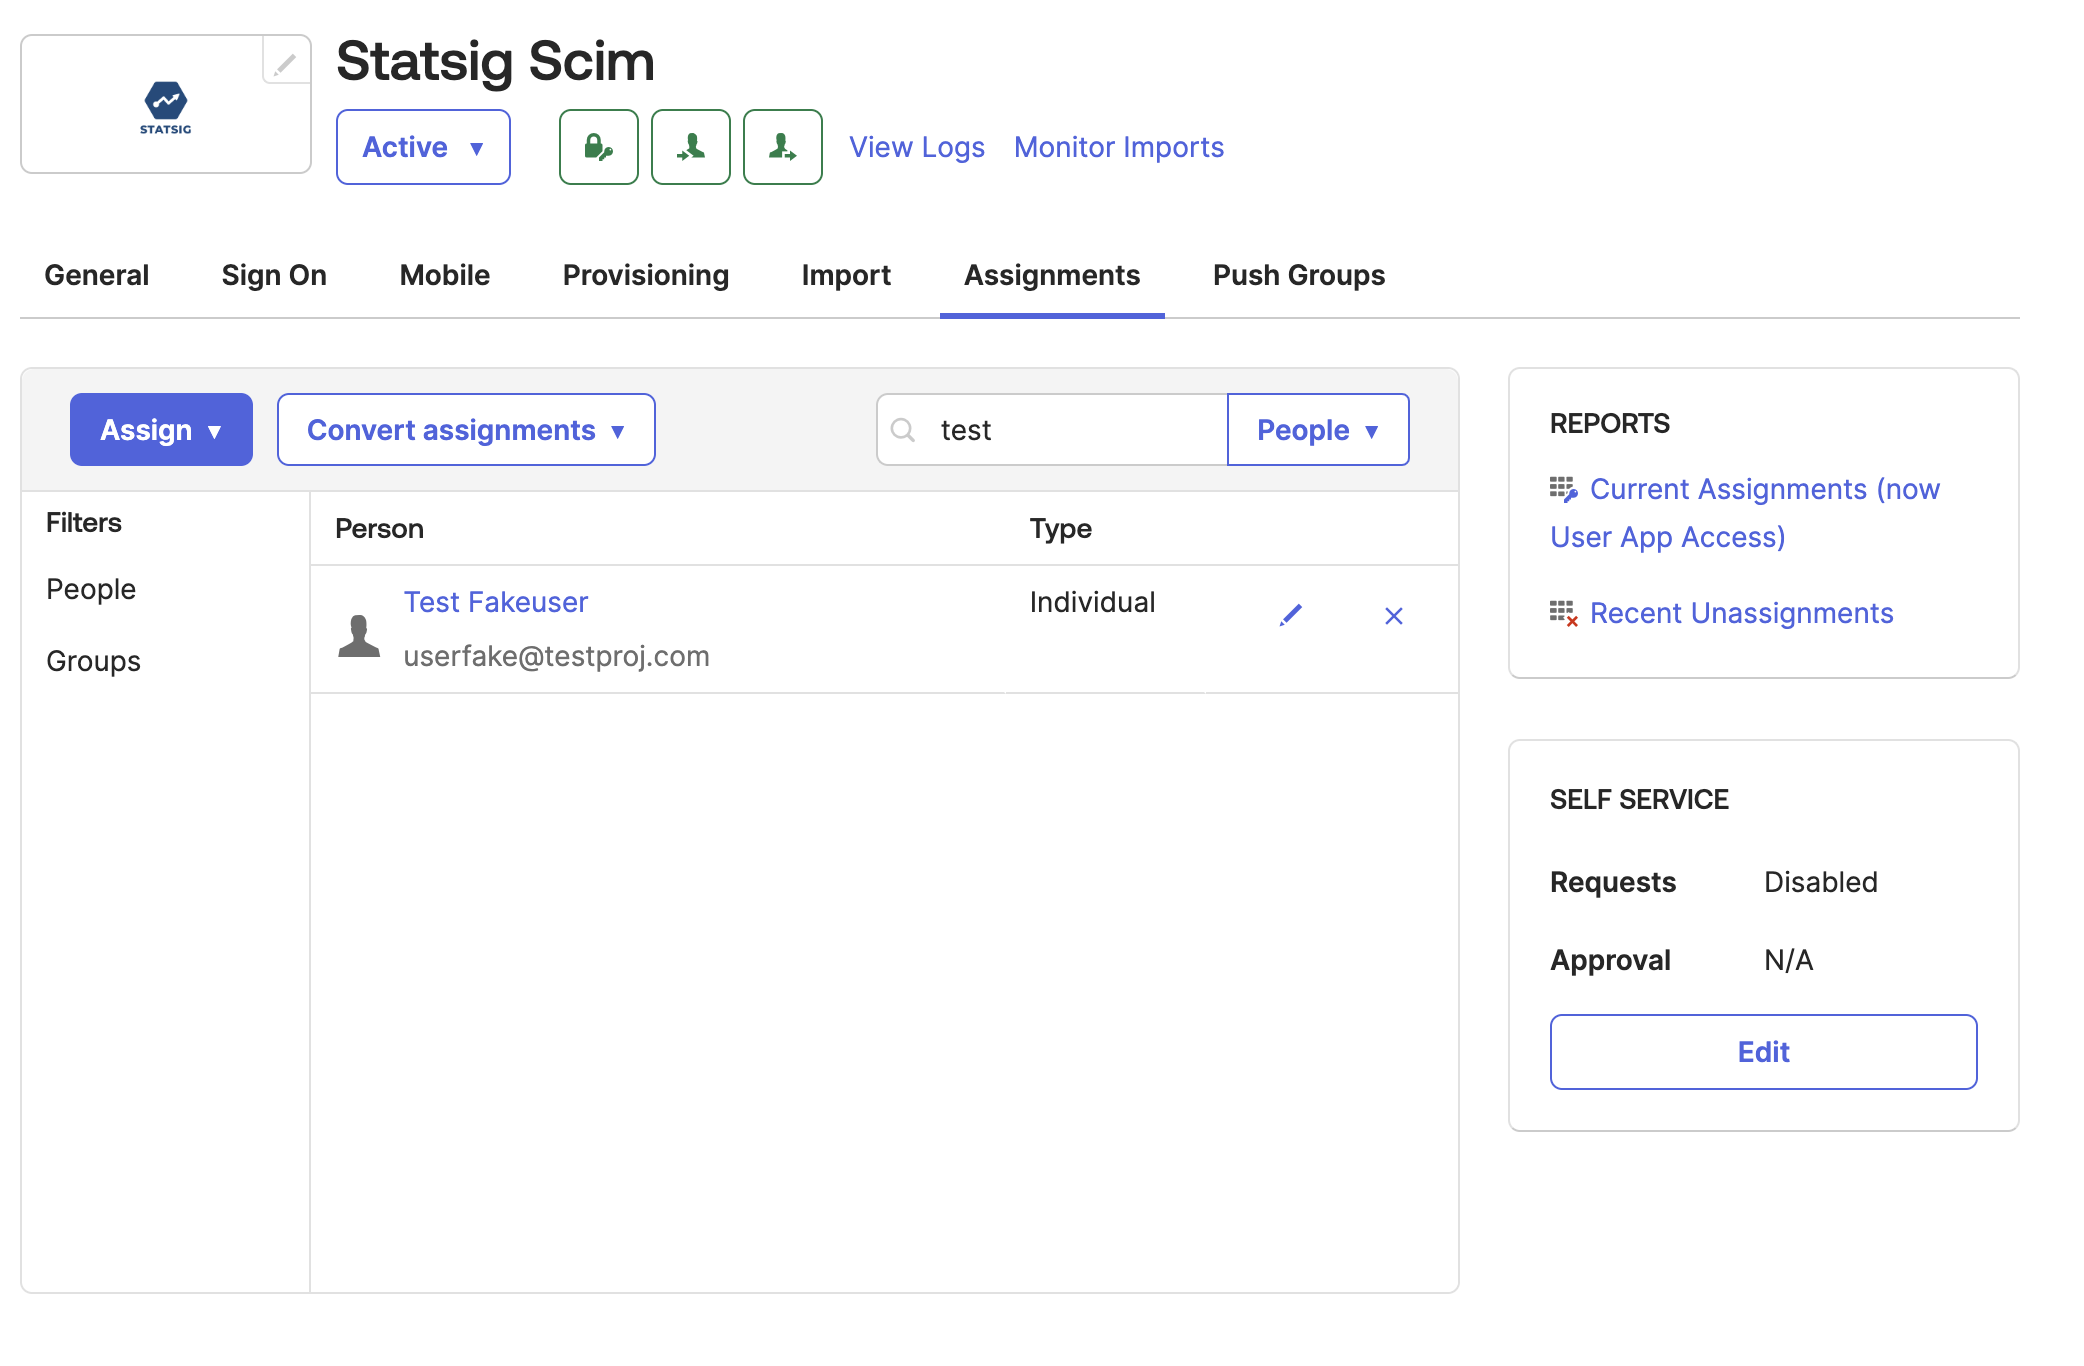
* Use the "Assignments" tab in Okta to add or remove users from Statsig
* Adding a user assignment in Okta will create the user in Statsig, while removing the assignment will deactivate the user's Statsig account
## Manage User Assignments
* Use the "Assignments" tab in Okta to add or remove users from Statsig
* Adding a user assignment in Okta will create the user in Statsig, while removing the assignment will deactivate the user's Statsig account
 ## Push Groups to Statsig
1. In Okta, go to the Statsig Integration's "Push Groups" tab
## Push Groups to Statsig
1. In Okta, go to the Statsig Integration's "Push Groups" tab
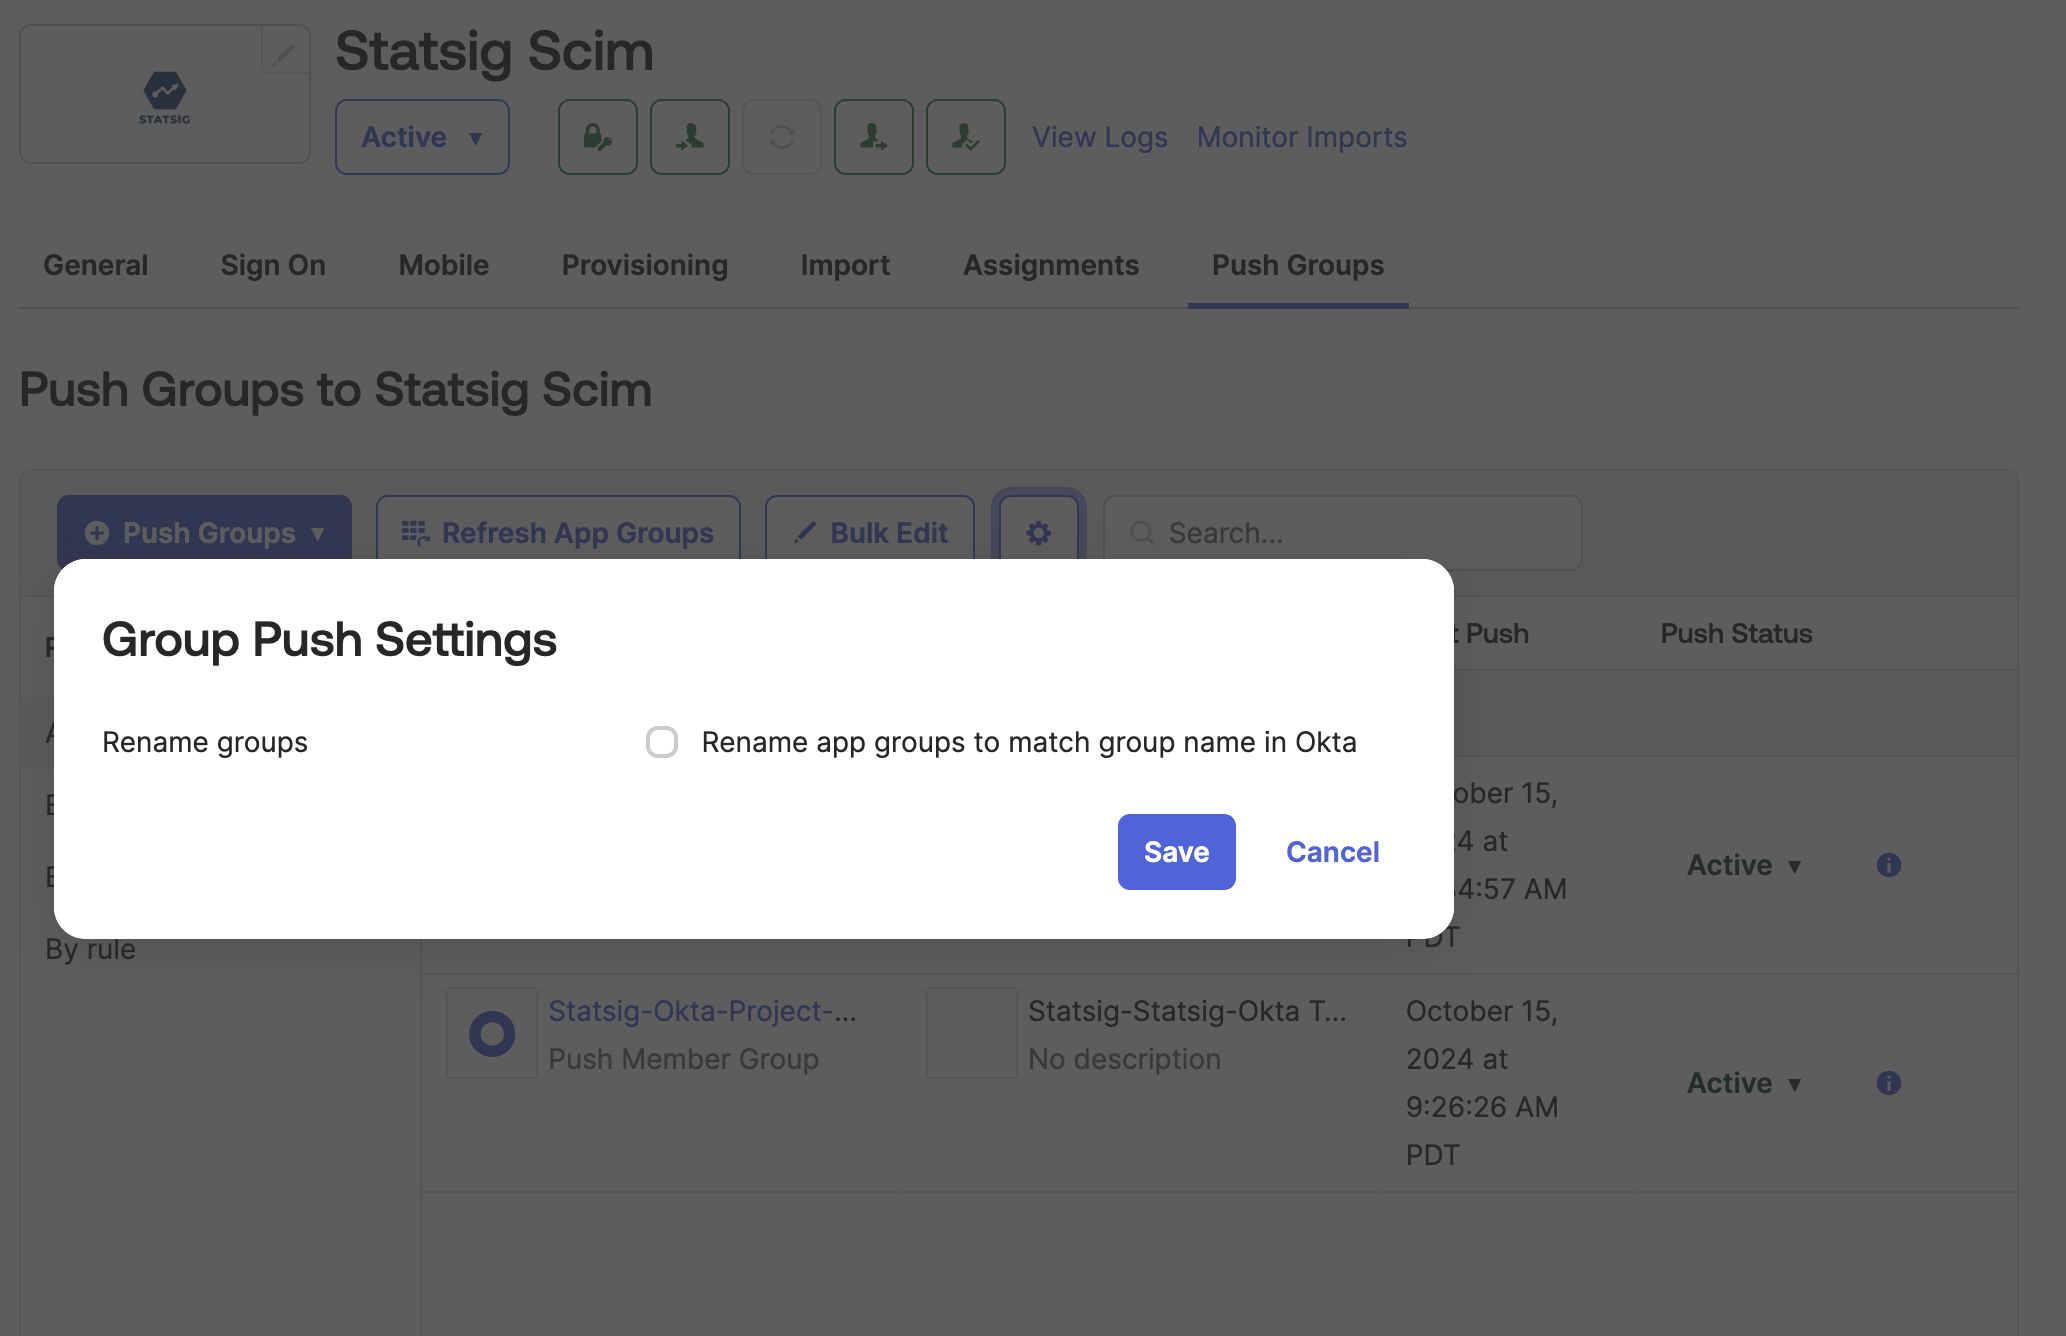
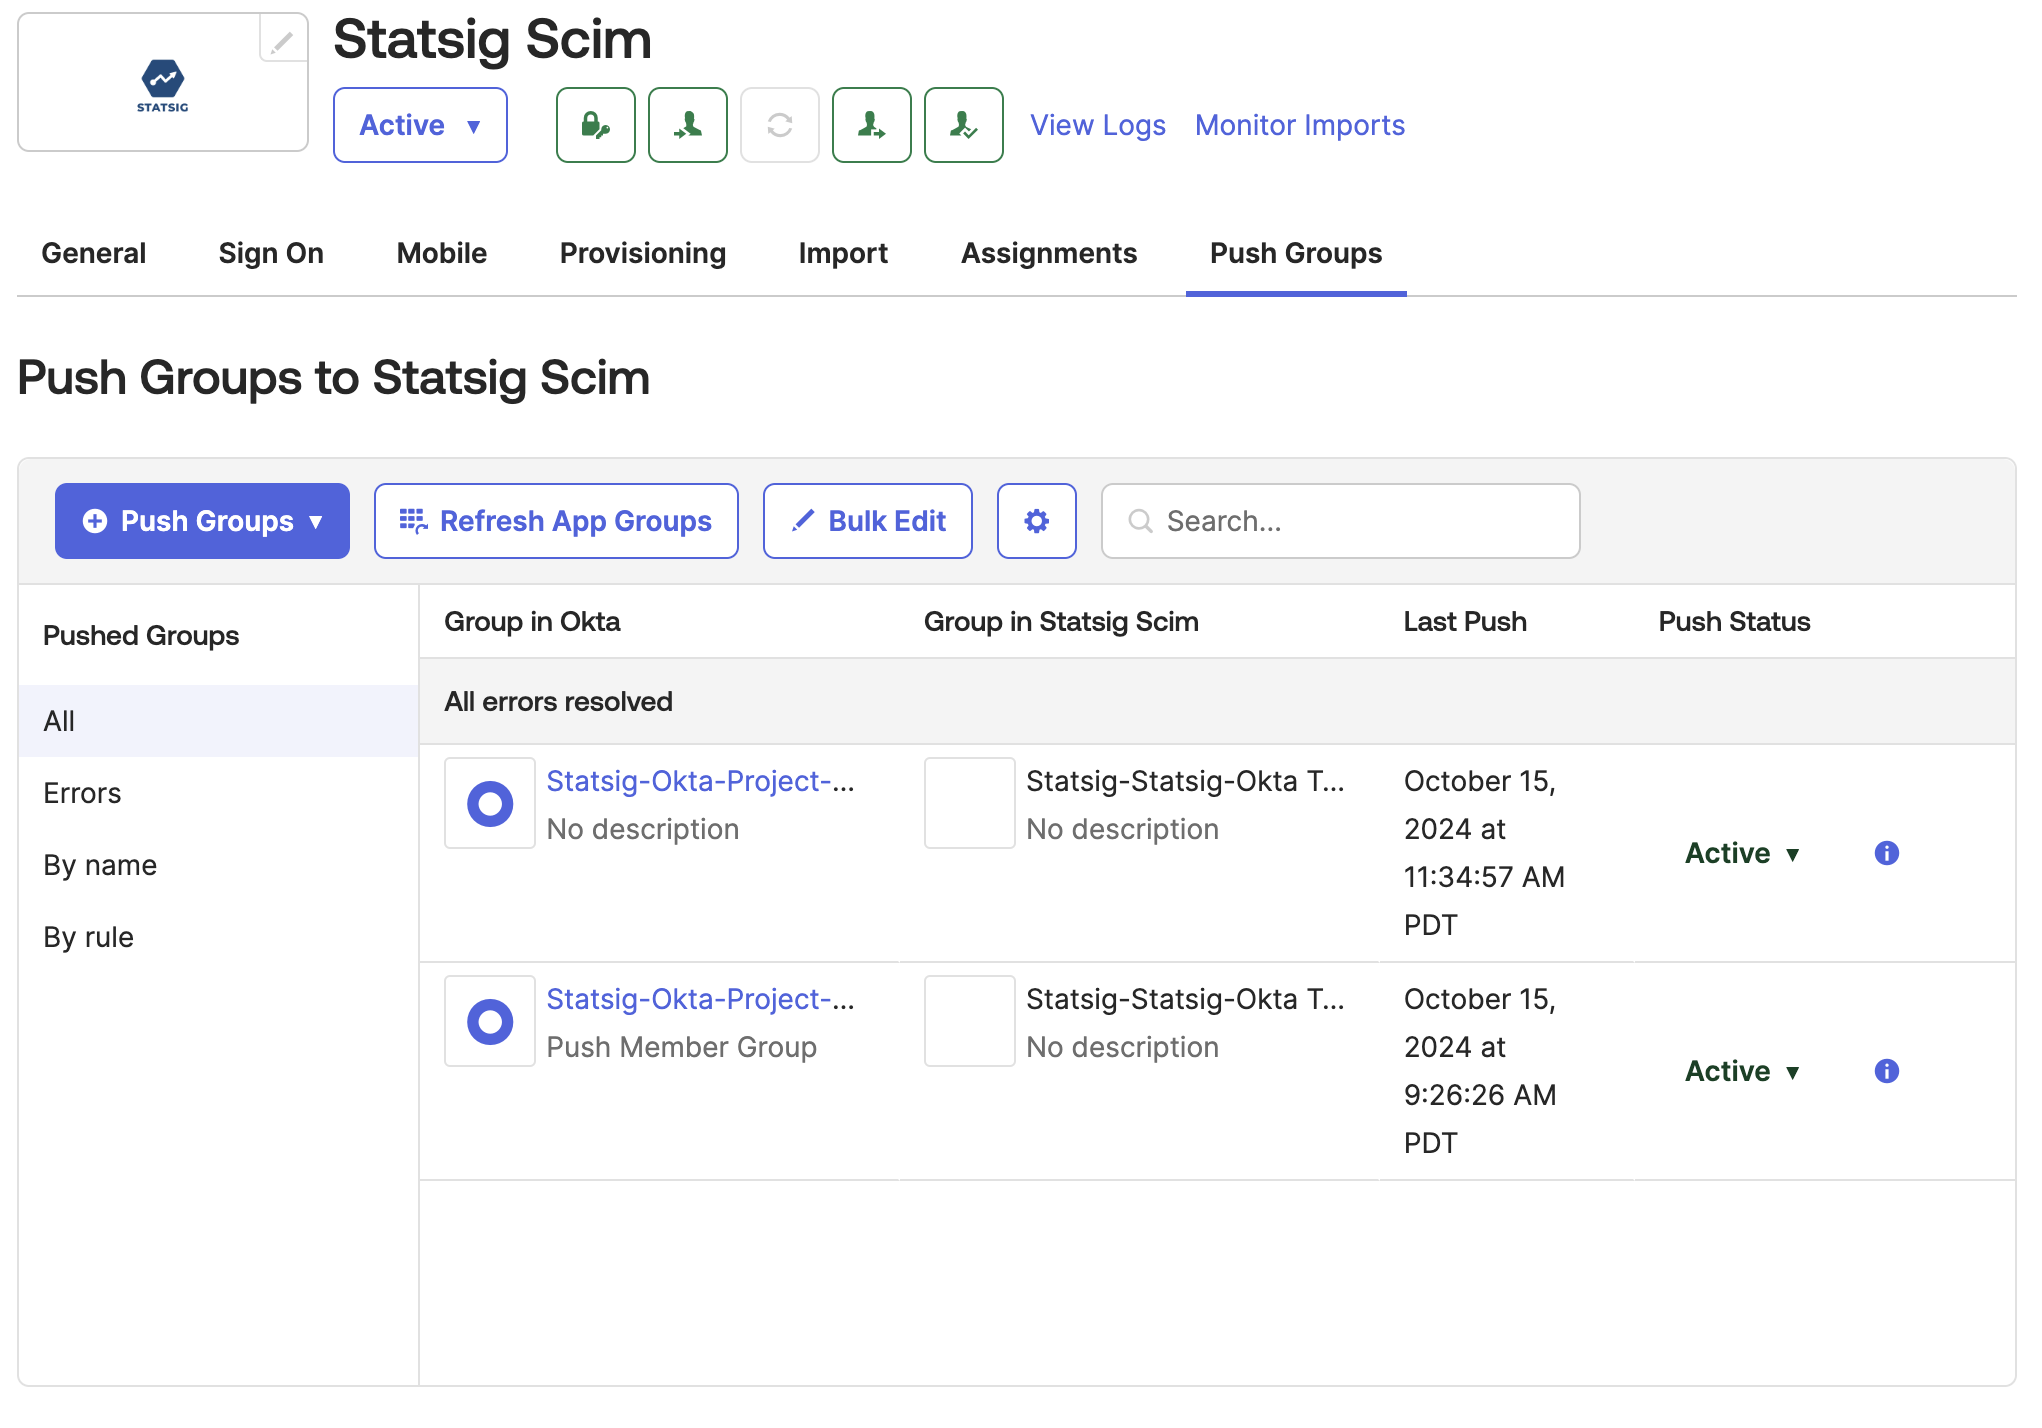 2. Click the settings button and disable "Rename Groups"
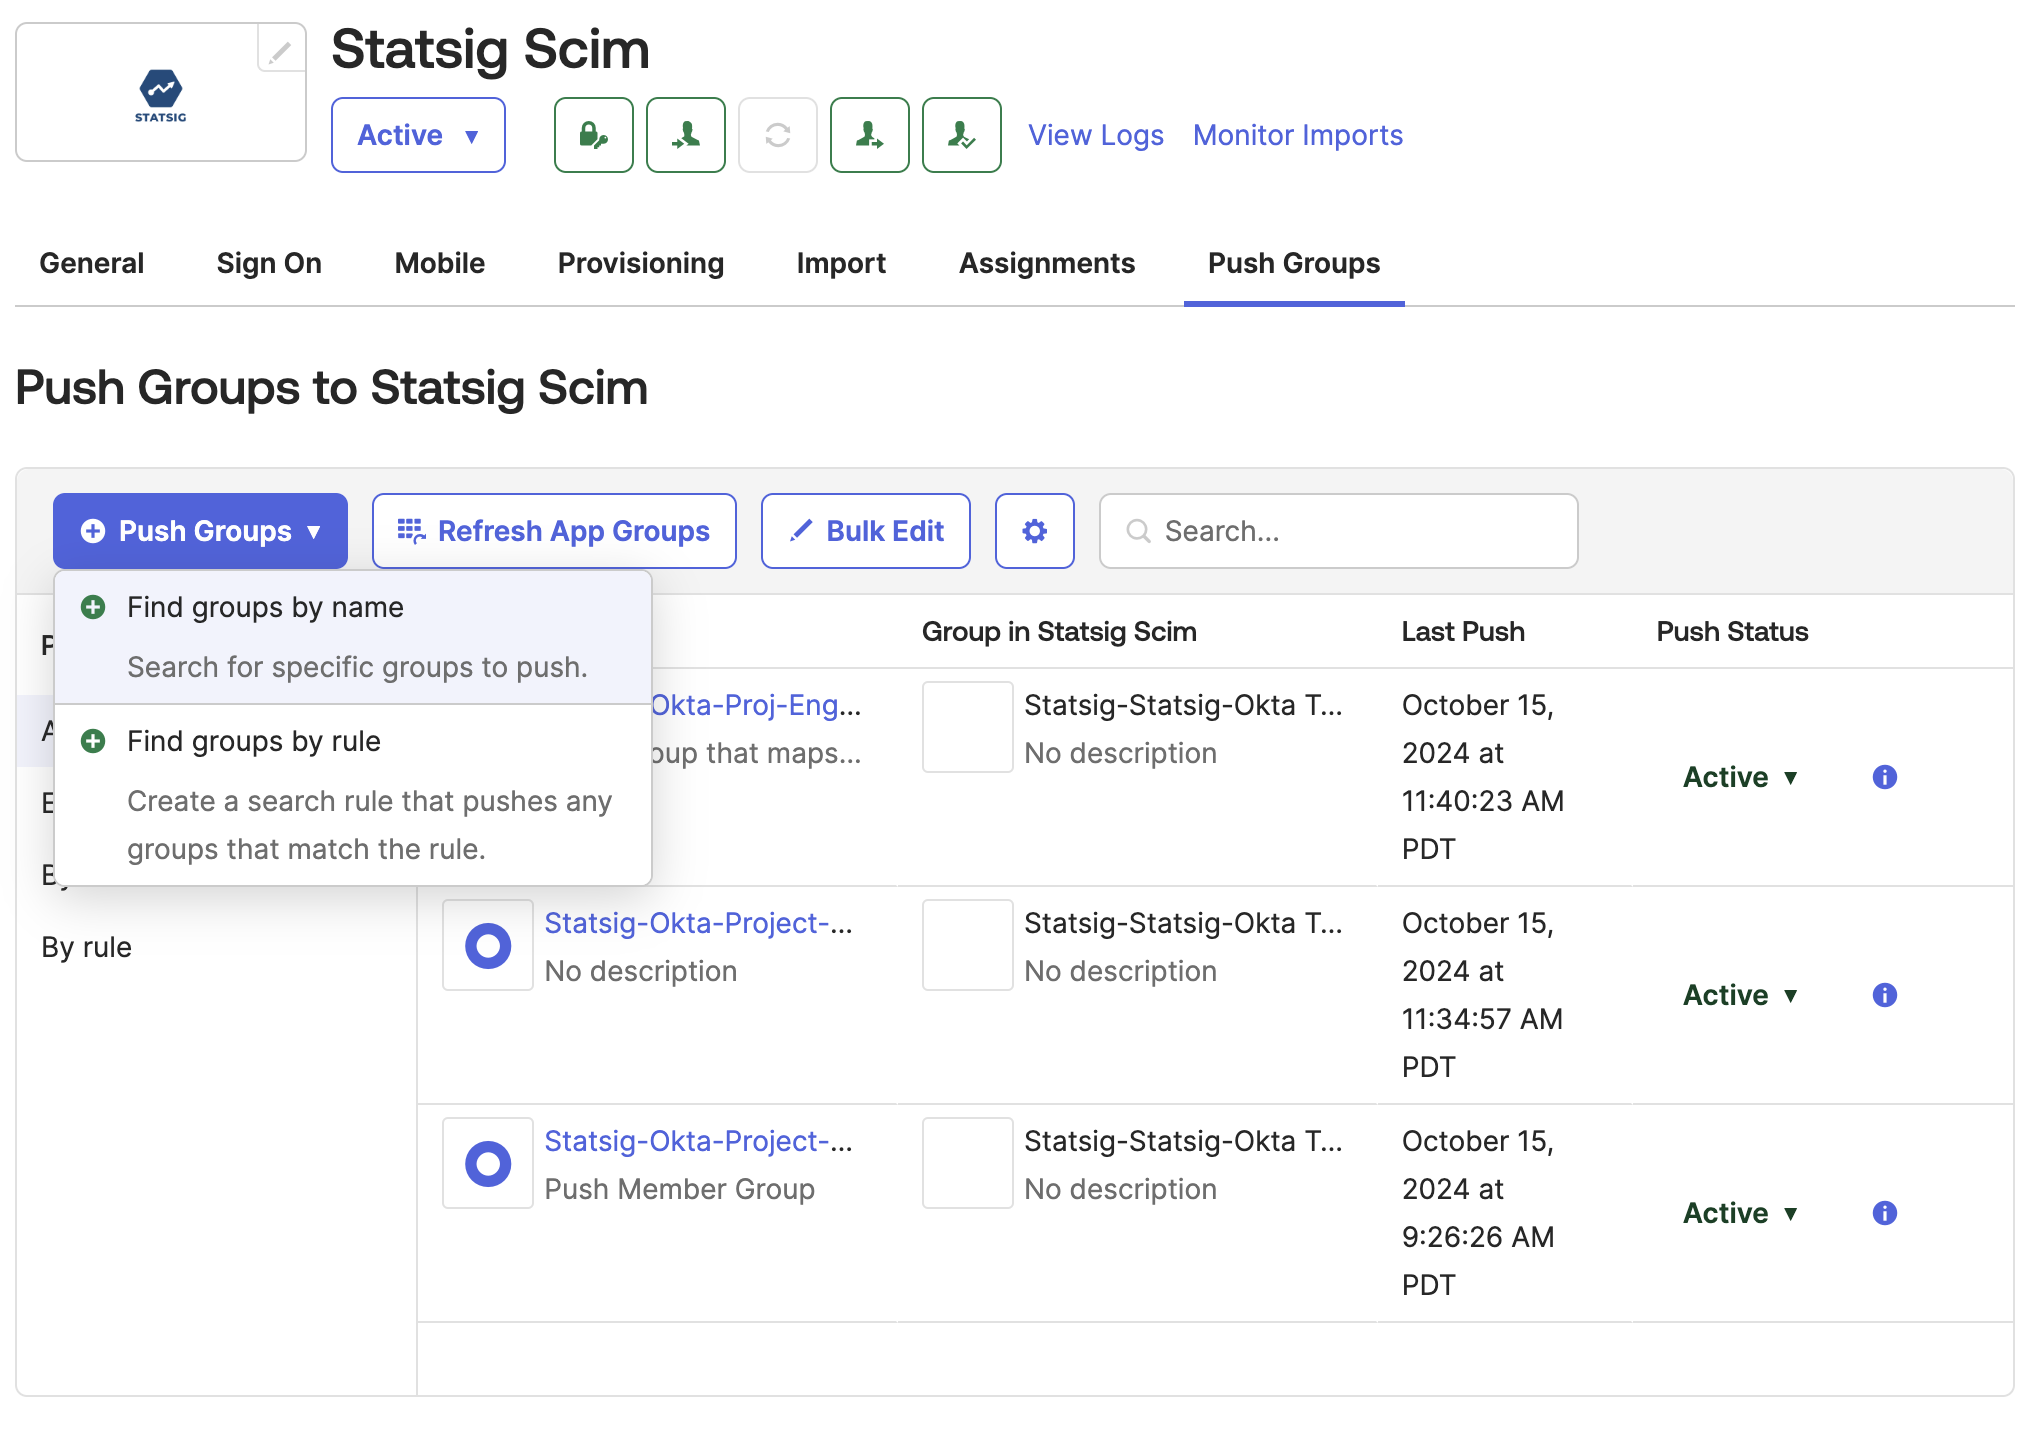
 3. Click "Push Groups" and select the method for finding groups in Okta.
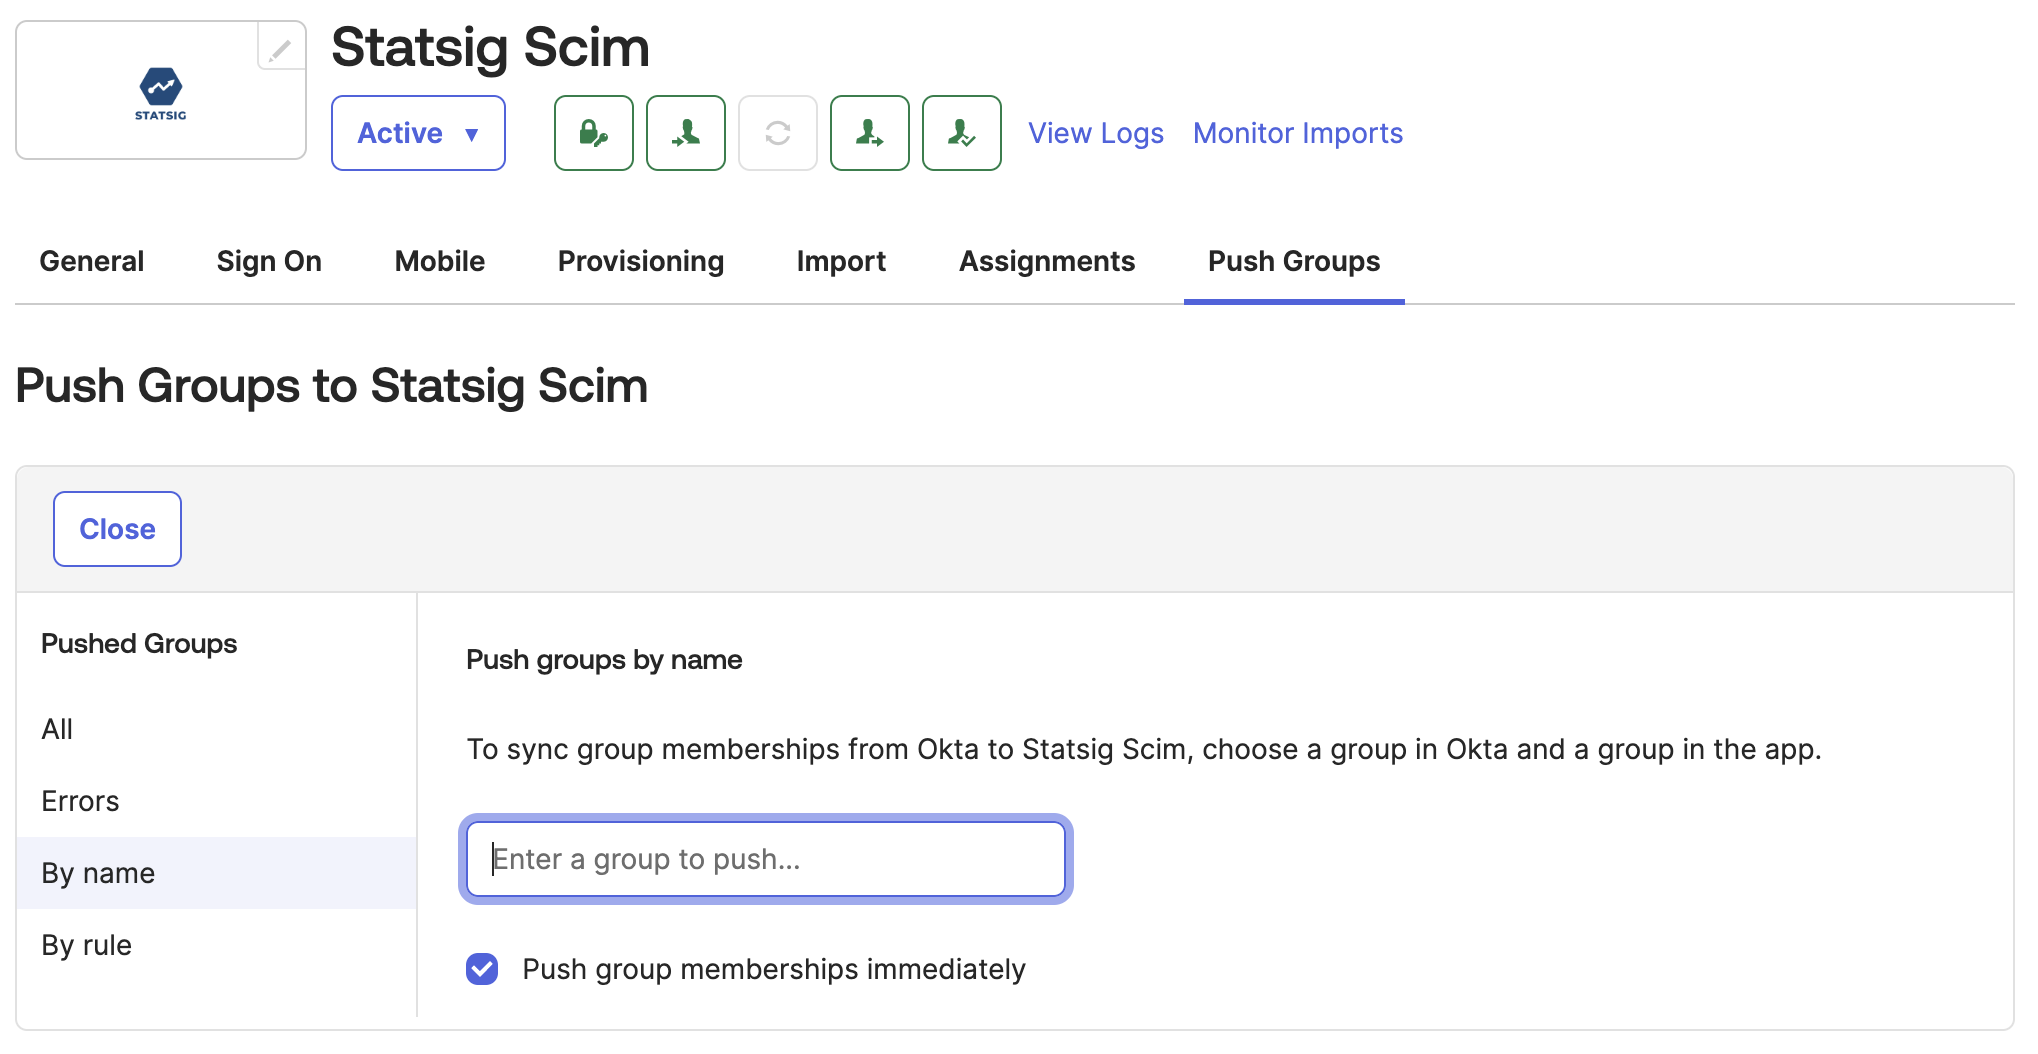
 4. Type in and select the Okta group that will push to a Statsig Project x Role Group.
* You can find Groups in left nav of Okta: `Directory > Groups`. In there, you will see the groups created from Okta and groups created by Statsig.
* The required groups are groups you created from Okta. You can filter by choosing `Group source type` and set to `Okta groups`. If you don't have any, go ahead and create it with members as well.
4. Type in and select the Okta group that will push to a Statsig Project x Role Group.
* You can find Groups in left nav of Okta: `Directory > Groups`. In there, you will see the groups created from Okta and groups created by Statsig.
* The required groups are groups you created from Okta. You can filter by choosing `Group source type` and set to `Okta groups`. If you don't have any, go ahead and create it with members as well.
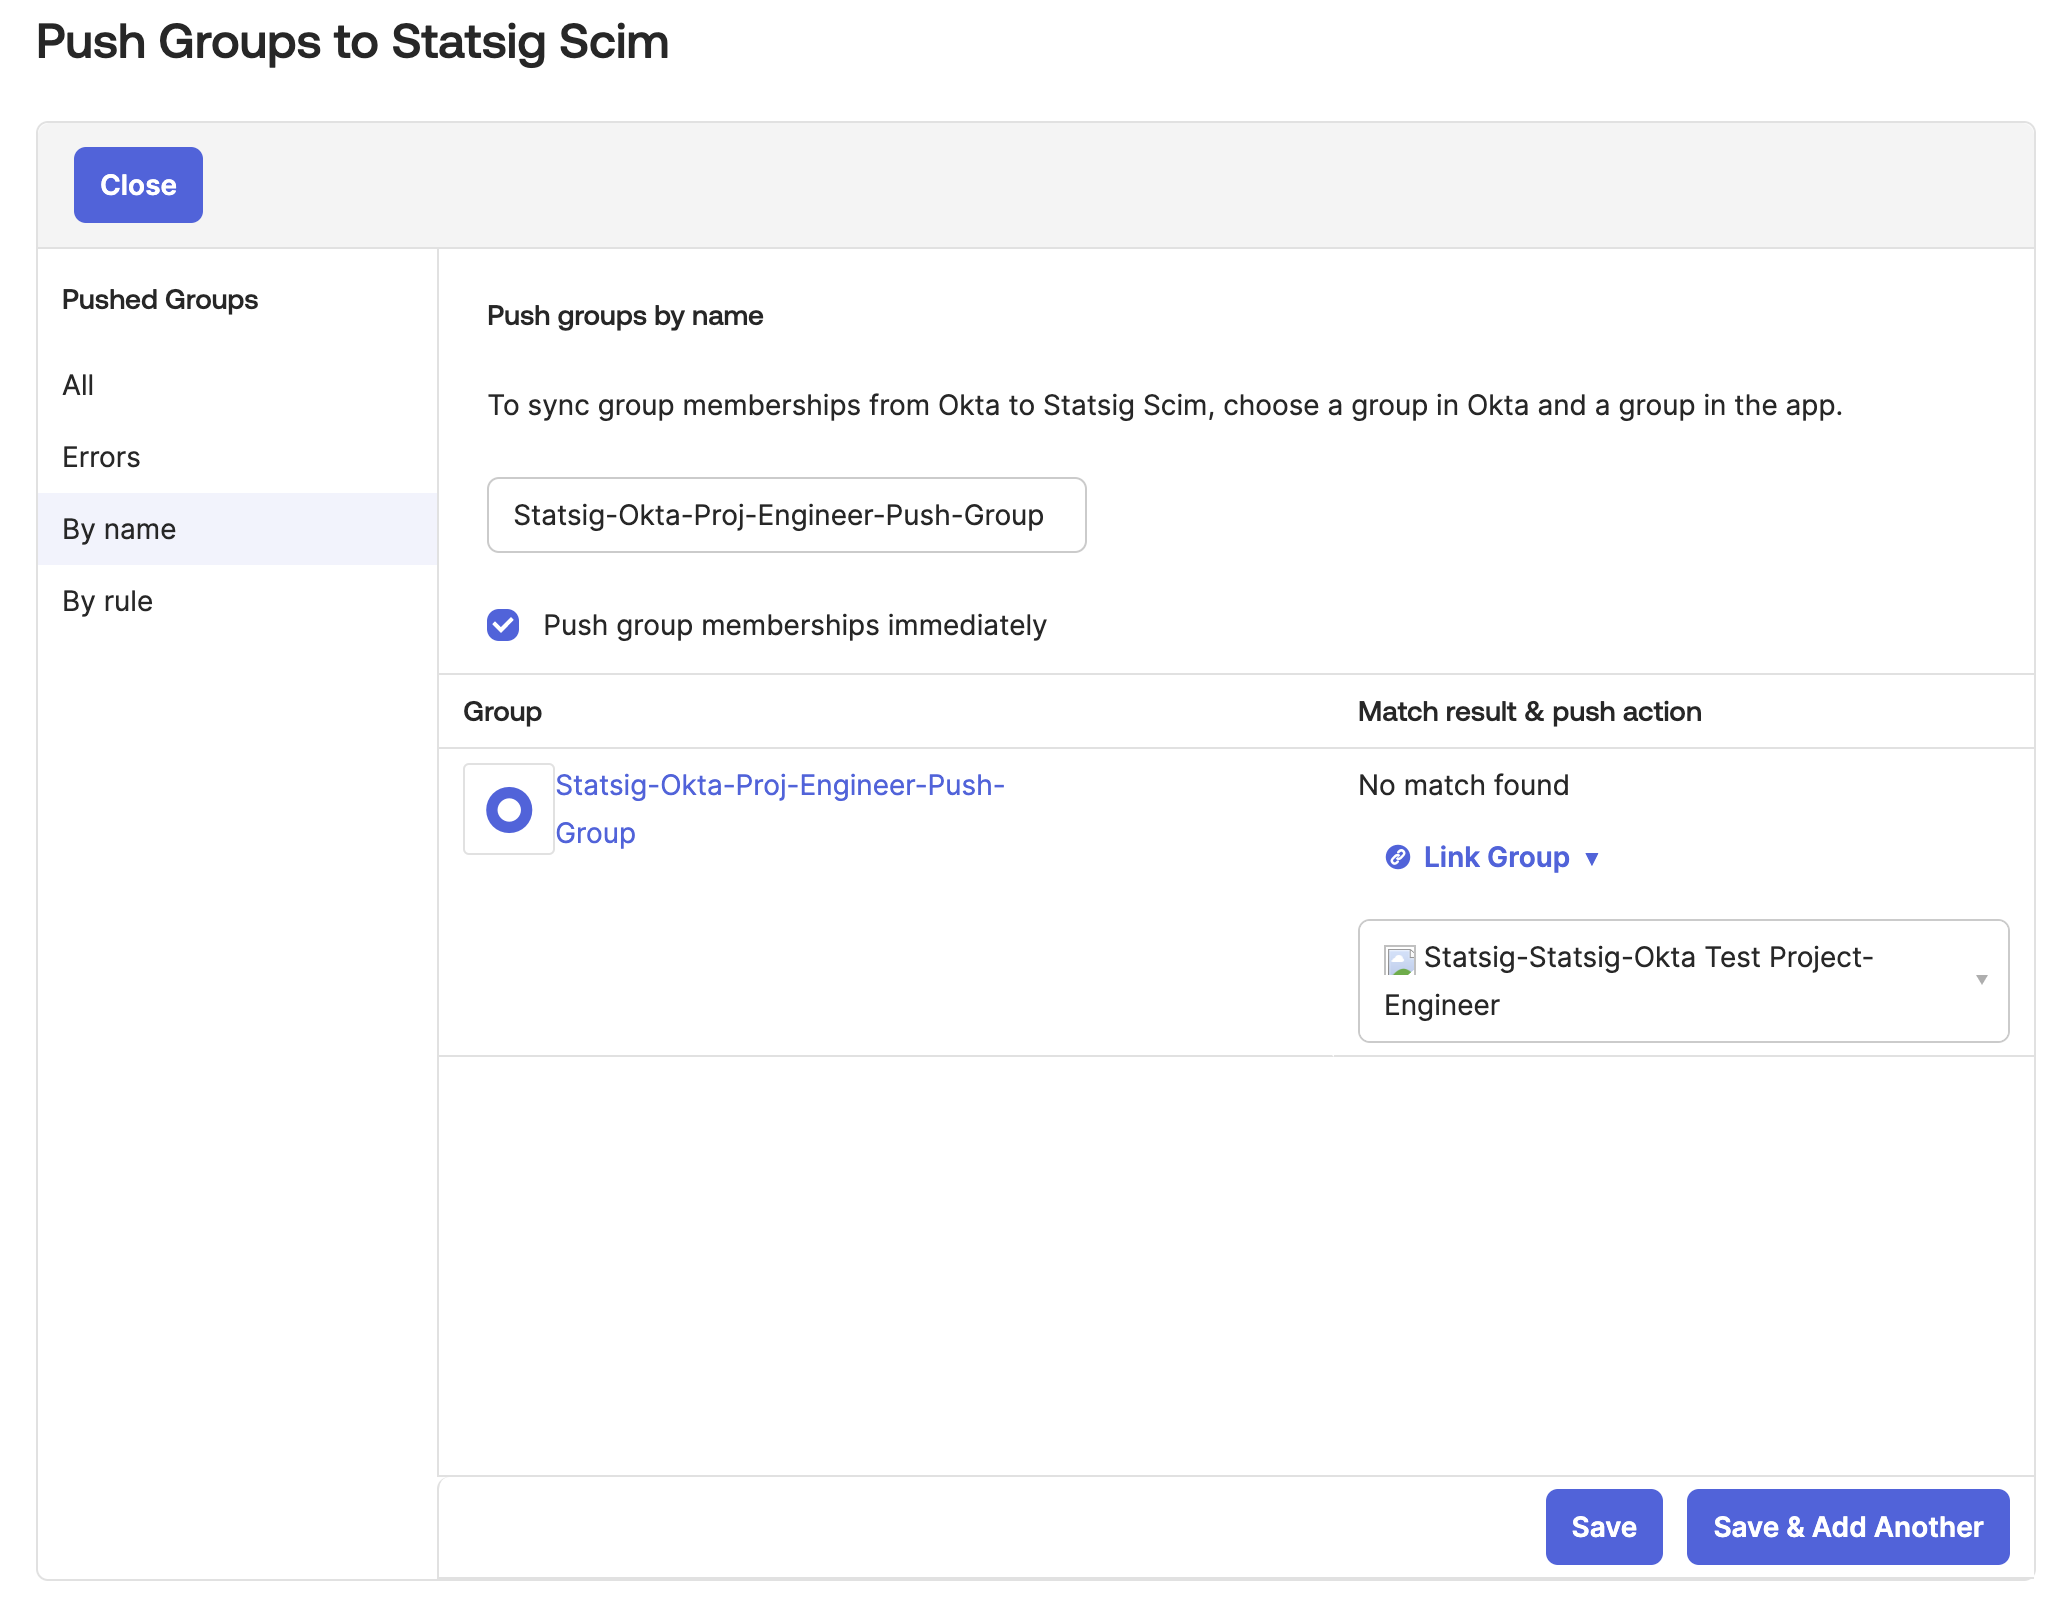
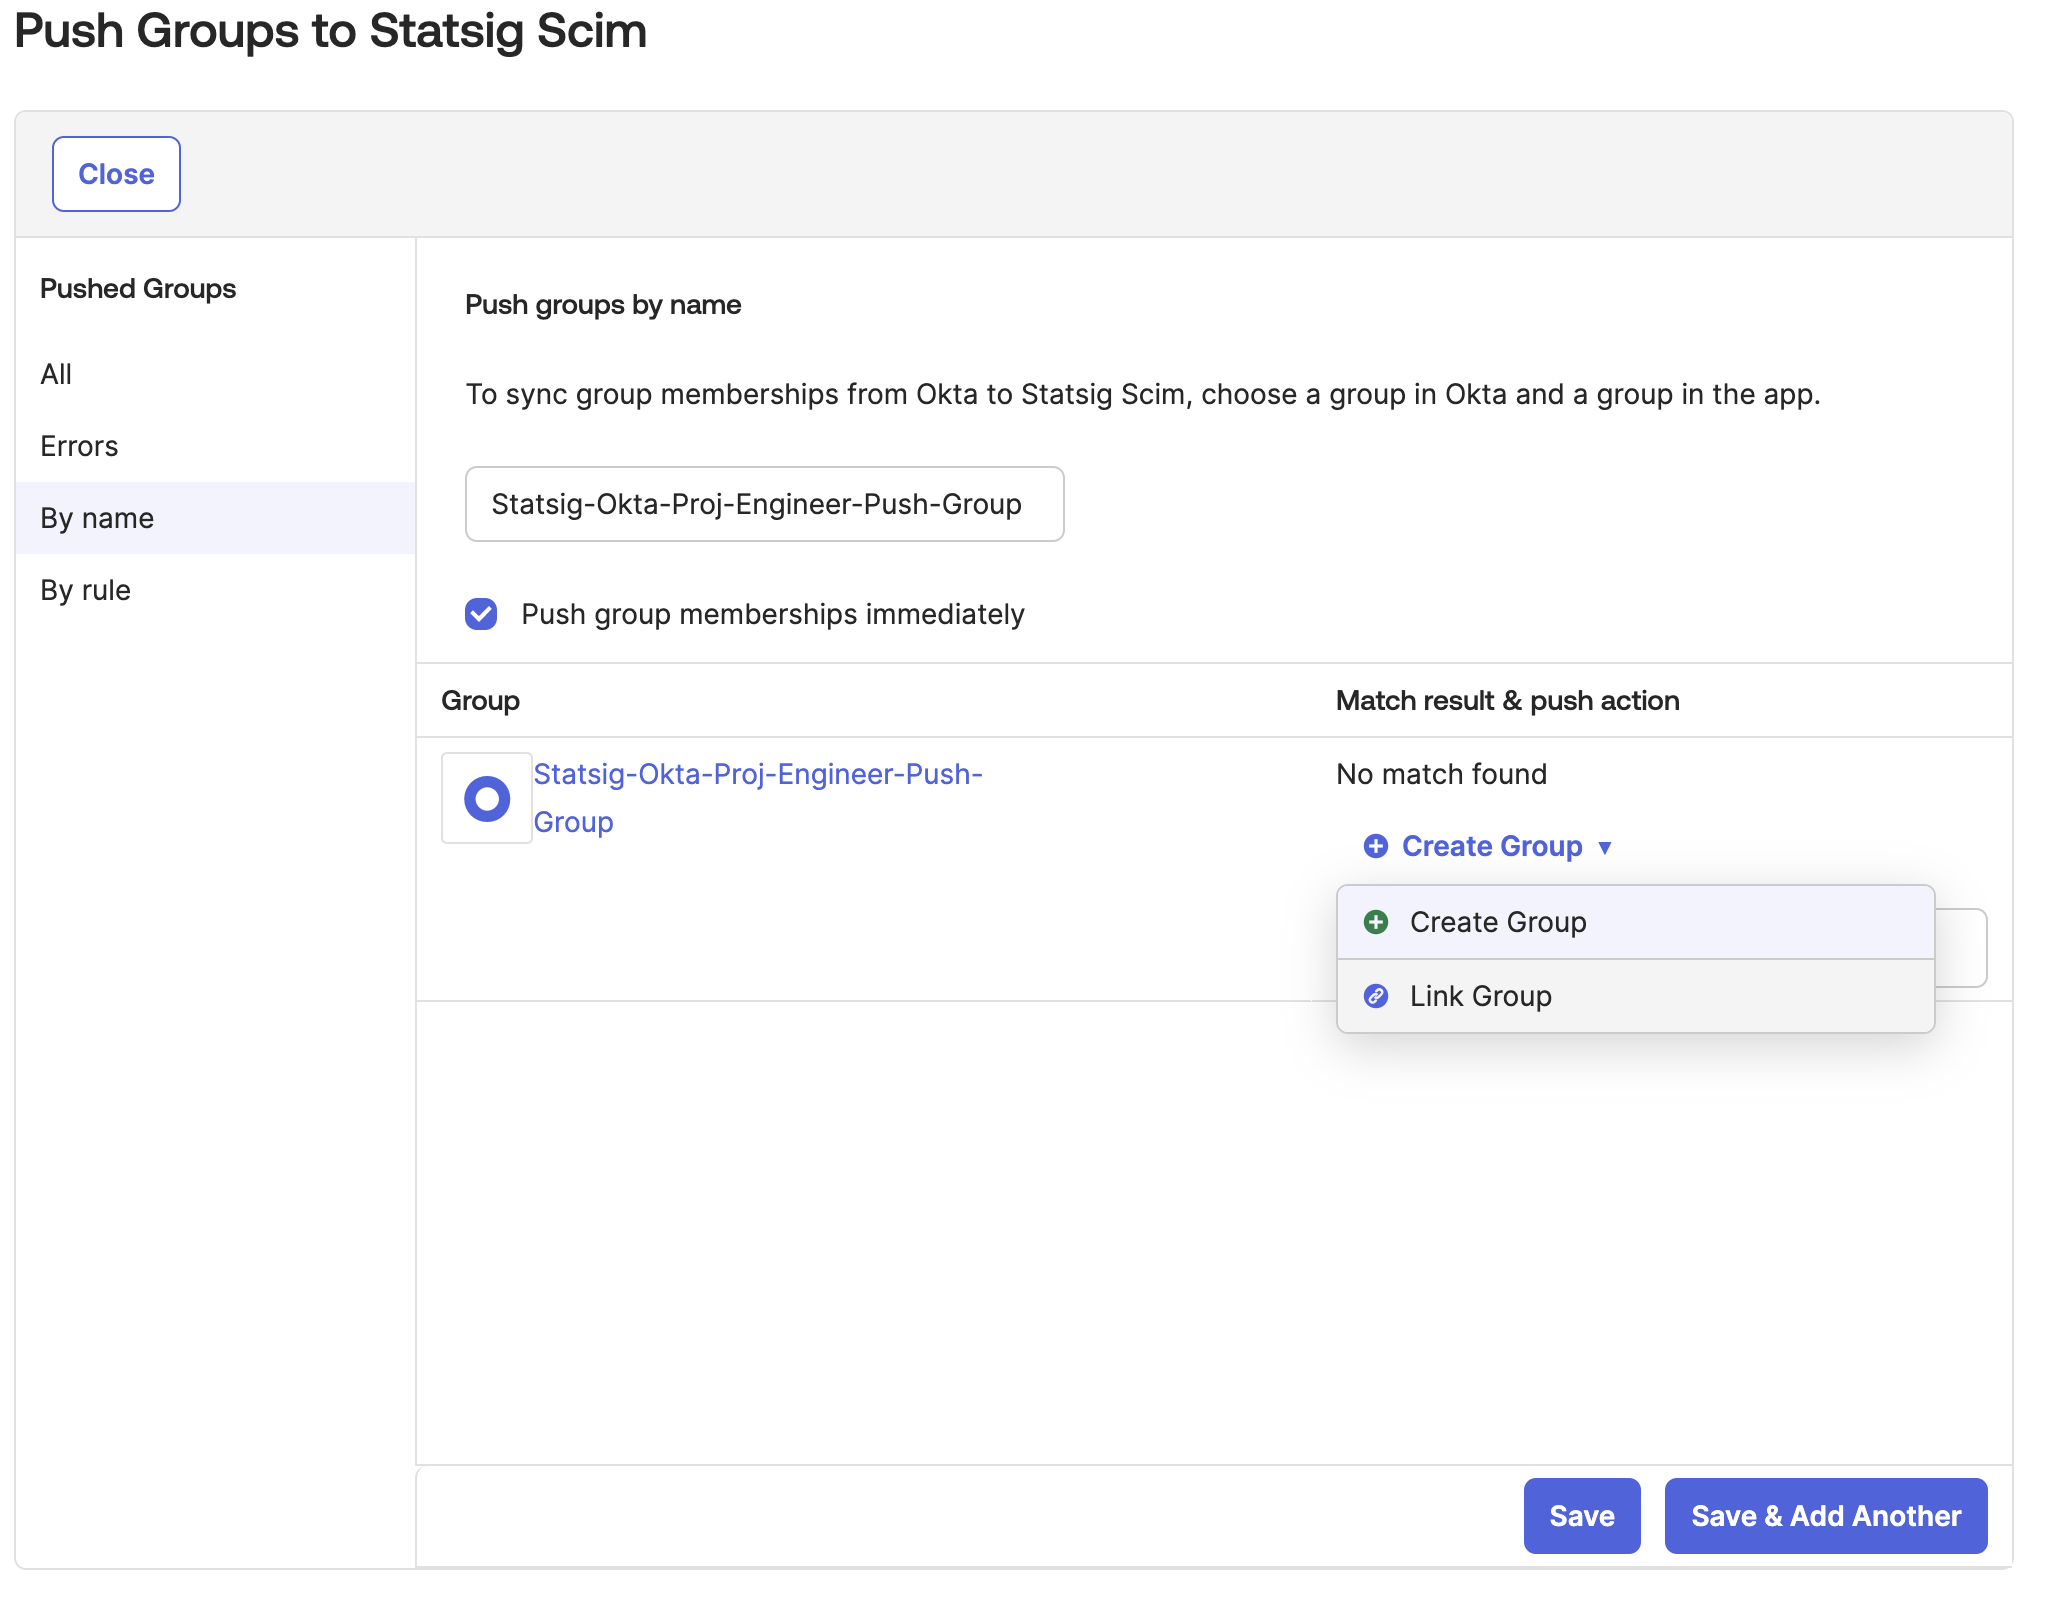
 5. Now let's link/assign Okta group you created from Okta to the Statsig groups with role you want.
* Change `Match Result & Push Action` to `Link Group`
5. Now let's link/assign Okta group you created from Okta to the Statsig groups with role you want.
* Change `Match Result & Push Action` to `Link Group`
 6. Select the Statsig Project x Role Group that the Okta group will push to.
* We display the Statsig Project x Role Group with the format `Statsig--` on Okta.
* By default Okta only allows you to map 1 Okta Group to 1 Statsig Group.
6. Select the Statsig Project x Role Group that the Okta group will push to.
* We display the Statsig Project x Role Group with the format `Statsig--` on Okta.
* By default Okta only allows you to map 1 Okta Group to 1 Statsig Group.
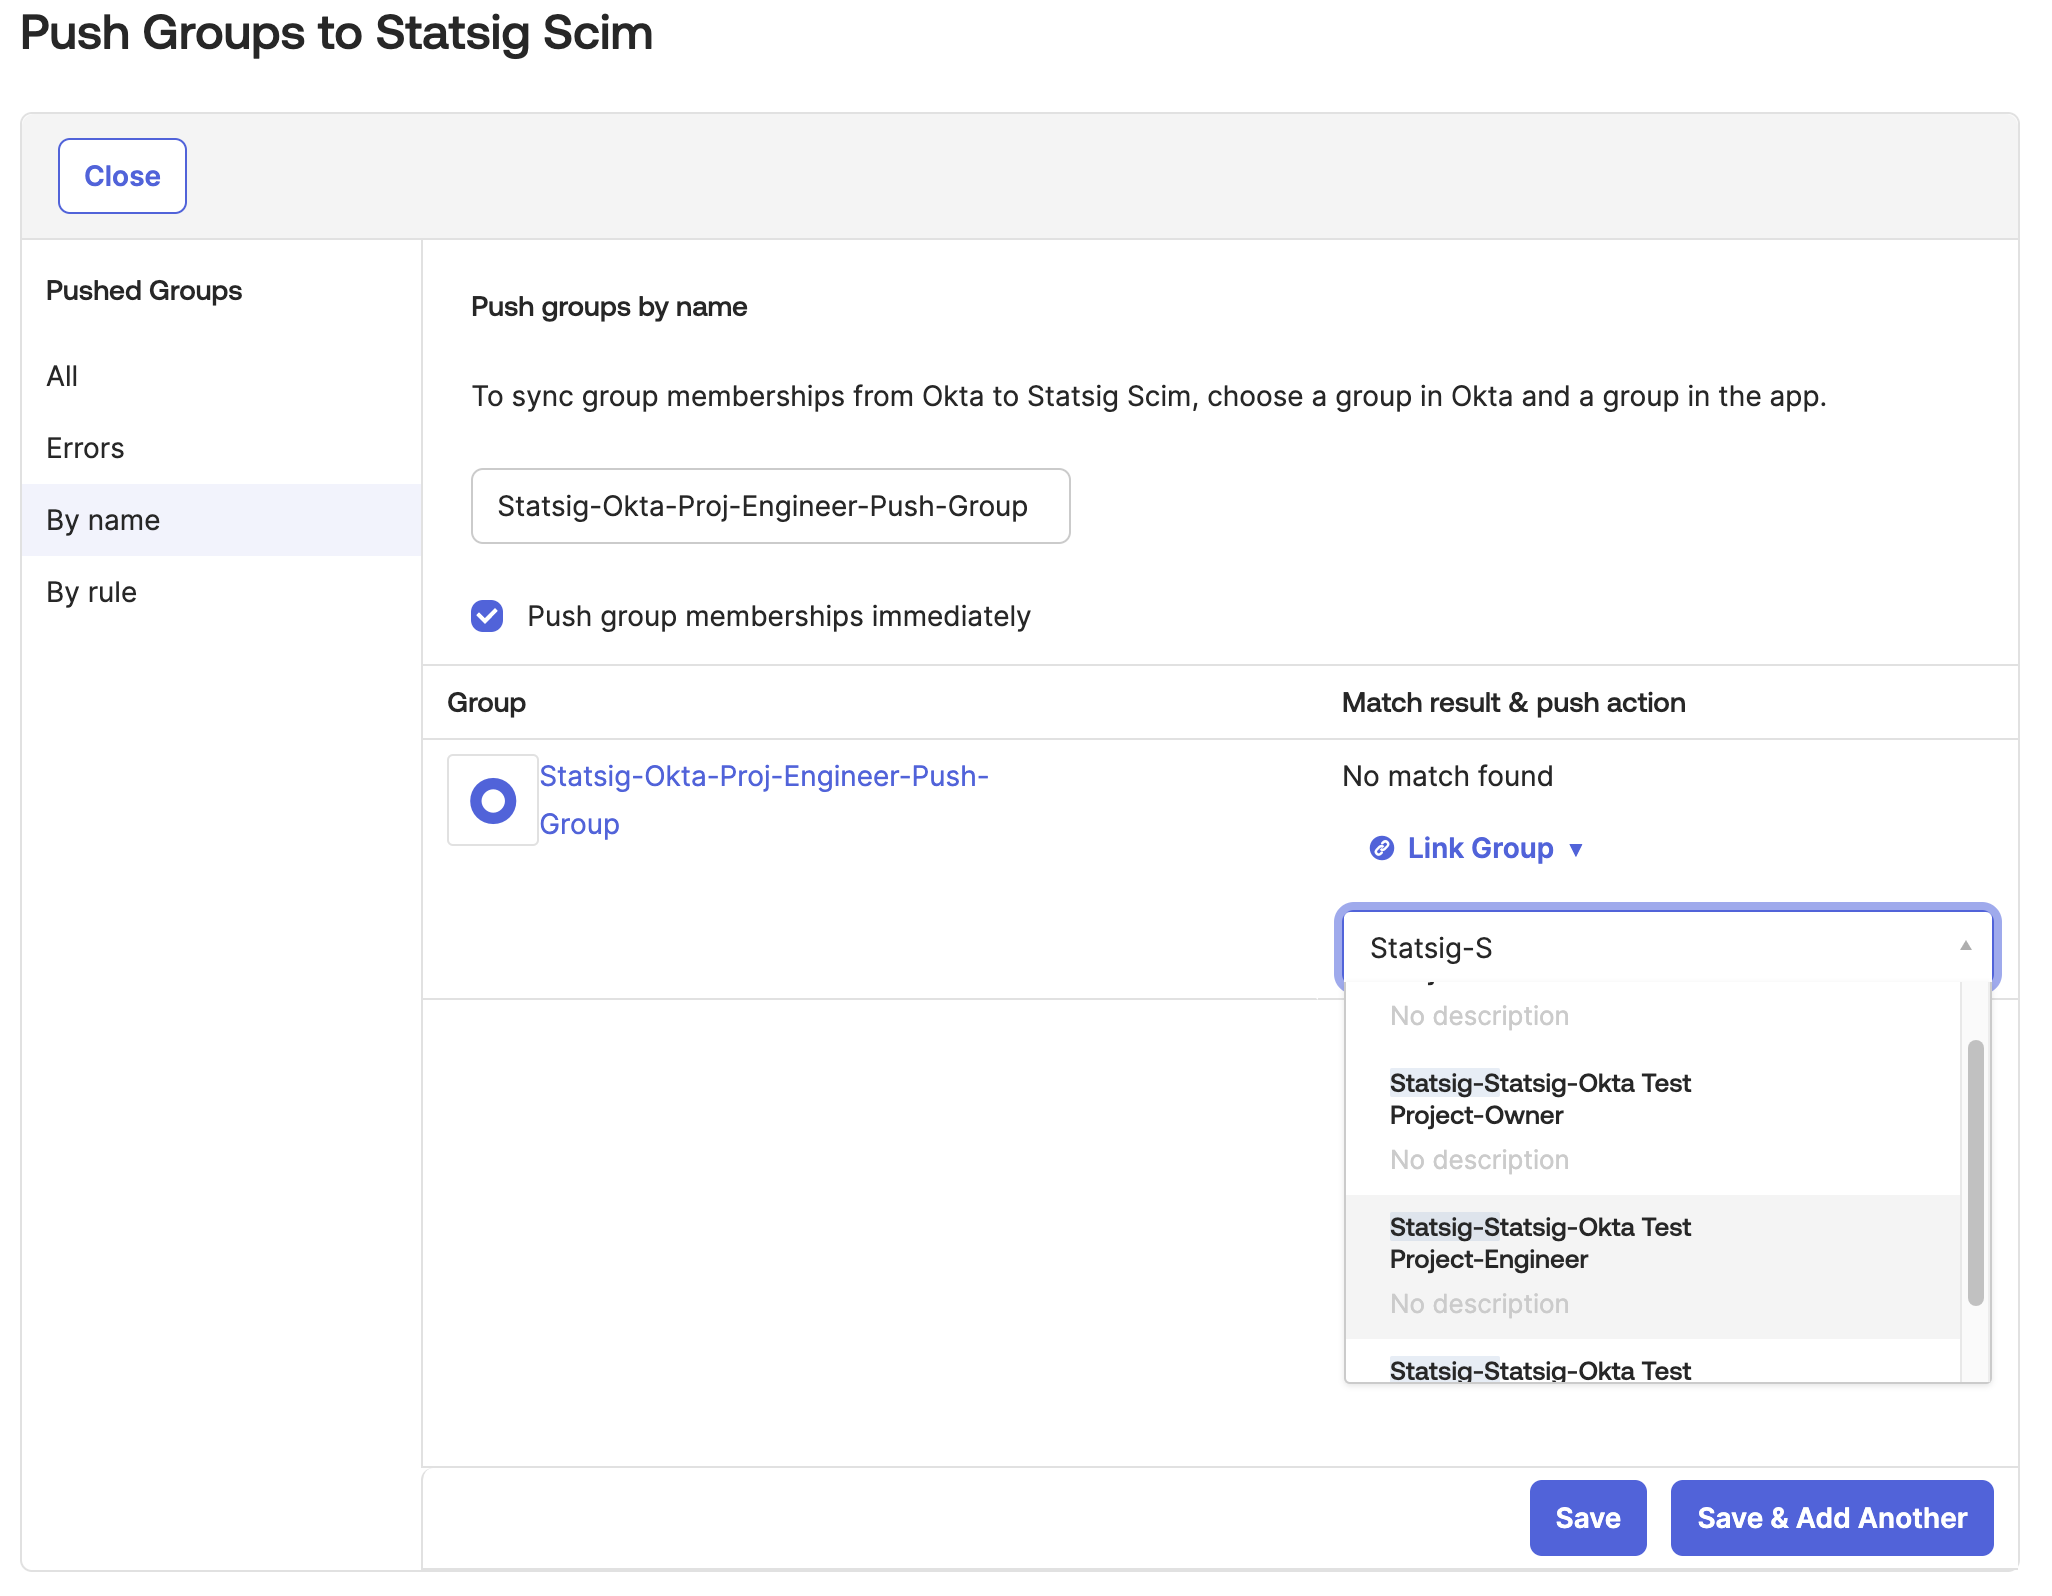 7. Then link the Okta group to a Statsig Project x Role Group. On save the group should push to Statsig. All future group changes on Okta will be pushed to Statsig.